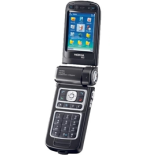
How to synchronize your Nokia N93 contacts with phonecopy
Nokia mobile phones are most used mobile phones and more and more people find themselves in need of making backup of their contacts. For these purposes there is a simple solution PhoneCopy.com, which we've prepared this tutorial for.
This article should work for all S60 3rd Edition phones which are: Nokia 3250, 3250 XpressMusic, 5500, 5500 Sport, 5500 Sport Music Edition, E50, E60, E61, E61i, E62, E65, E70, N71, N73, N73 Music Edition, N77, N80, N80 Internet Edition, N91, N91 Music Edition, N92, N93, N93i.
Next help and advices are on page How to
How to start?

Primarily in this case we will be using Nokia N93, a cellphone with S60 3rd Edition operating system. We've chosen this model, because the setting is very similar to many more phones from this vendor. The list of officially supported devices is here.
Registration on Phonecopy.com
Phonecopy client registration is simple. Choose your username and insert your email address, where we will send you a confirmation email that you will need to activate your account.
Phone setup
To have your contacts saved you have to synchronize the Nokia with PhoneCopy. First step is to set up the synchronization on the Nokia. For better illustration, we've made some screenshots, but experienced users naturally won't need and will be able to set up the phone on their own, or following the device manual on PhoneCopy website. But back to the screenshots now: create a new synchronization profile in the menu:


After your phone is synchronized, go back to your PhoneCopy online profile (probably you will have it still open in the browser since you activated your account) and accept the assignment of your phone to the account. If you do it within the hour after the synchronization, the phone will be assigned automatically and you will only need to confirm the process. If the delay is greater than one hour, you will be asked by the server for the cellphone's identification number, called IMEI. This number can be easily found under the battery of the cellphone, or you can type in the symbols *#06# and the IMEI will appear on the display.

