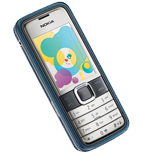
Sauvegarder contacts, calendrier, tâches et notes depuis Nokia 7310 Supernova

Available guides for synchronization to the secure cloud
Supported functions
- synchronisation des contacts
- synchronisation du calendrier
- synchronisation des tâches
- synchronisation des notes
Nokia 7310 Supernova est pris en charge avec PhoneCopy. Veuillez noter que les paramètres suivants peuvent varier légèrement en fonction de la version du micrologiciel.
Confirmed models
Confirmed versions
Nouvelles
- 06/07/2022
- Recently we got new user of Nokia 7310 Supernova also in Ghana. He is using PhoneCopy for backup of contacts.
Nokia 7310 Supernova utilisateurs dans le monde
Nokia 7310 Supernova est privilégié pour la sauvegarde des contacts par les utilisateurs de PhoneCopy dans plusieurs pays du monde - Ghana (Gaana, Gana) - 100.00%.
Sur la carte
La carte de chaleur suivante illustre le partage entre les utilisateurs du monde entier synchronisant leur Nokia 7310 Supernova à l'aide de PhoneCopy.
Guide textuel - Comment sauvegarder
Avec Nokia 7310 Supernova
Guideline n'a pas encore été traduit dans votre langue.
- Press Menu and choose Settings - Configuration - Personal config. sett..
- Press Options and choose Add new - Synchronization and configure given fields.
▼ hide fields
- Account name: Write PhoneCopy
- Server address: Write http://www.phonecopy.com/sync
- User name: your_username
- Password: your_password
- Contacts database:
- Database address
- Write contacts
- User name
- Leave empty.
- Password
- Leave empty.
- Calendar database:
- Database address
- Write calendar
- User name
- Leave empty.
- Password
- Leave empty.
- Notes database:
- Database address
- Write notes
- User name
- Leave empty.
- Password
- Leave empty.
- Use pref. access pt.: If you want to use your preferred access point to connect to PhoneCopy, choose Yes, otherwise choose No and set up the access point in the next menu item Access point settings.
- Press Back, go to the name of the profile you have just created, press Options and choose Activate.
- Press Back twice.
- Choose Sync and backup - Data transfer and go to Server sync but do not enter this item.
- Press Options - Edit - Sync settings and configure given fields.
▼ hide fields
- Configuration: Choose Personal config. - Select.
- Account: Choose PhoneCopy - Select.
- User name: Fill in your user name.
- Password: Fill in your password.
- Press Back and choose Synchronized data.
- Mark the items you want to synchronize and press Done (or Back if you made no changes).
- If the cell phone asks you Save changes?, choose Yes.
- Choosing Server sync you can now start synchronization with PhoneCopy.
If you need more help with the settings, visit our step by step screenshot guide.
Et maintenant, veuillez assigner votre téléphone à votre compte PhoneCopy.
En cas de problemes dans la synchonisation, veuillez nous contacter.

