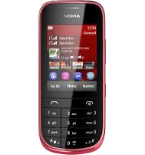
Sauvegarder contacts, calendrier et notes depuis Nokia Asha 202

Available guides for synchronization to the secure cloud
Supported functions
- synchronisation des contacts
- synchronisation du calendrier
- synchronisation des notes
Nokia Asha 202 est pris en charge avec PhoneCopy. Veuillez noter que les paramètres suivants peuvent varier légèrement en fonction de la version du micrologiciel.
Confirmed models
Confirmed versions
Nouvelles
- 11/01/2024
- Nokia Asha 202 phone was synchronized by PhoneCopy user in Russie. His contacts were transferred.
- 19/04/2022
- We detected PhoneCopy app on Nokia Asha 202 phone in Nigeria. All contacts were backed up.
- 01/11/2021
- Even in Allemagne we have a user with Nokia Asha 202 phone. He backs up his contacts.
- 19/04/2021
- We just got first user of this model in Syrie! Someone just backed up his contacts.
- 21/11/2019
- Someone used PhoneCopy for backup of this phone model in Philippines. His contacts were transferred.
Nokia Asha 202 utilisateurs dans le monde
Nokia Asha 202 est souvent utilisé par les utilisateurs de PhoneCopy dans des pays comme Inde (Bharôt, ভাৰত, ভারত, Bhārat, ભારત, भारत, Bhārata, ಭಾರತ, Bhāratam, ഭാരതം, Bharôtô, ଭାରତ, ਭਾਰਤ, भारतम्, Bārata, பாரதம், Bhāratadēsam, భారత దేశం) - 94.71%, Philippines (Pilipinas) - 2.40%, Kenya - 0.96%, Syrie (Suriyah, سورية) - 0.48%, Russie (Rossiya, Rossiâ, Россия) - 0.48%, Allemagne (Deutschland) - 0.48%, Nigeria (Nijeriya, Naigeria, Nàìjíríà) - 0.48%.
Sur la carte
L'histogramme illustre la sauvegarde de Nokia Asha 202 avec PhoneCopy dans le monde entier.
Guide textuel - Comment sauvegarder
Avec Nokia Asha 202
- Choose Menu - Settings - Configuration - Personal config. sett..
- Press Options and choose Add new - Synchronization and configure given fields.
▼ hide fields
- Account name: Write PhoneCopy and press OK.
- Server address: Write http://www.phonecopy.com/sync and press OK.
- User name: your_username
- Password: your_password
- Contacts database: To Database address write contacts. Do not fill in any user name or password. Press Back.
- Calendar database: To Database address write calendar. Do not fill in any user name or password. Press Back.
- Notes database: To Database address write notes. Do not fill in any user name or password. Press Back.
- Use pref. access pt.: Choose Yes,If you want to use your preferred access point GPRS to connect to PhoneCopy. otherwise choose No, and set up the access point at your operator.
- Press Back, go to the name of the profile you have just created, and press Options and choose Activate.
- Press twice Back and choose Sync and backup - Data transfer.
- Find Server sync, press Options and choose Edit.
- Choose Synchronized data mark the items you want to synchronize and press Done or Back.
- Press twice Back.
- Now you can start the synchronization with Phonecopy, press Server sync.
If you need more help with the settings, visit our step by step screenshot guide.
Et maintenant, veuillez assigner votre téléphone à votre compte PhoneCopy.
En cas de problemes dans la synchonisation, veuillez nous contacter.

