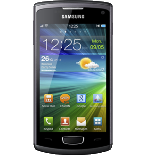
Sauvegarder contacts, calendrier, tâches et notes depuis Samsung Wave 3 (GT-S8600)

Available guides for synchronization to the secure cloud
Supported functions
- synchronisation des contacts
- synchronisation du calendrier
- synchronisation des tâches
- synchronisation des notes
Samsung Wave 3 (GT-S8600) est pris en charge avec PhoneCopy. Veuillez noter que les paramètres suivants peuvent varier légèrement en fonction de la version du micrologiciel.
Confirmed models
Confirmed versions
Guide textuel - Comment sauvegarder
Avec Samsung Wave 3 (GT-S8600)
Guideline n'a pas encore été traduit dans votre langue.
First go to the phone's Main Menu and then follow these steps:
- Select Settings, then Connectivity.
- Click Synchronise and select Create.
- Configure given fields.
▼ hide fields
- Profile name: write PhoneCopy
- Synchronization category: Select the items you would like to synchronize. All will synchronize all items.
- Contacts
- to remote contacts write contacts, the rest can be left blank.
- Plan
- to remote calendar write calendar, the rest can be left blank.
- Task
- to remote task write tasks, the rest can be left blank.
- Notes
- to remote notes write notes, the rest can be left blank.
- Synchronization type: select Full sync
- Synchronization server:
- Address
- write http://www.phonecopy.com/sync
- Login ID
- your_username
- Password
- your_password
- Save the data.
- Go to section Synchronise, click on the PhoneCopy profile and select Sync now.
If you need more help with the settings, visit our step by step screenshot guide.
Et maintenant, veuillez assigner votre téléphone à votre compte PhoneCopy.
En cas de problemes dans la synchonisation, veuillez nous contacter.

