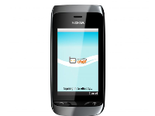
Backup Nokia Asha 310 with PhoneCopy

Available guides for synchronization to the secure cloud
Supported functions
Nokia Asha 310 is supported on PhoneCopy. Please note that following settings may vary a little depending on the firmware version.
Confirmed models
Confirmed versions
News
- 20/12/21
- Someone used PhoneCopy for backup of this phone model in Nigeria. His contactos were transferred.
- 14/03/21
- First user from Philippines just synced his contactos on Nokia Asha 310 phone.
- 05/02/21
- User from Bangladesh has synchronized contactos with his phone.
- 27/06/20
- We just got first user of this model in Indonesia! Someone just backed up his contactos.
- 22/06/20
- Someone used PhoneCopy for backup of this phone model in Egypt. His contactos were transferred.
Nokia Asha 310 users around the world
According to our statistics, PhoneCopy users use Nokia Asha 310 for data backup in countries India (Bharôt, ভাৰত, ভারত, Bhārat, ભારત, भारत, Bhārata, ಭಾರತ, Bhāratam, ഭാരതം, Bharôtô, ଭାରତ, ਭਾਰਤ, भारतम्, Bārata, பாரதம், Bhāratadēsam, భారత దేశం) - 60.56%, Kenya - 19.72%, Nigeria (Nijeriya, Naigeria, Nàìjíríà) - 7.04%, Pakistan (Pākistān, پاکستان) - 2.82%, Malaysia (Mǎláixīyà, 马来西亚, Malēṣiyā, மலேசியா) - 2.82%, Bangladesh (বাংলাদেশ) - 2.82%, Philippines (Pilipinas) - 1.41%, Egypt (Misr, Masr, مصر) - 1.41%, Indonesia - 1.41%.
On the map
Histogram depicts Nokia Asha 310 backup with PhoneCopy around the world.
Text guideline - How to backup
With Nokia Asha 310
First go to the phone's Main Menu and then follow these steps:
- Select Settings - Configuration - Personal config. settings - Synchronization
- Set given fields for account configuration.
▼ hide fields
- Name account: write PhoneCopy
- Server Address: write http://www.phonecopy.com/sync
- User name: your_username
- Password: your_password
- Select items you want to back up:
▼ hide fields
- Contacts database: Select Database address write contacts
- Calendar database: Select Database address and write calendar
- Notes database: Select Database address and write notes
- Go to Connection - Data Transmission - Server sync. and Options.
- Select Edit - Data for Sync and mark the items you want to synchronise.
- Answer the question Yes.
- Select Synchronization settings - Configuration - Personal Configuration and press Select.
And now please, assign your phone to your PhoneCopy account.
In the case of problems with synchronization, please contact us.

